Interface Tour
This page walks through every panel and menu in the Solar Sailer main window, so you know where to look before you start editing.
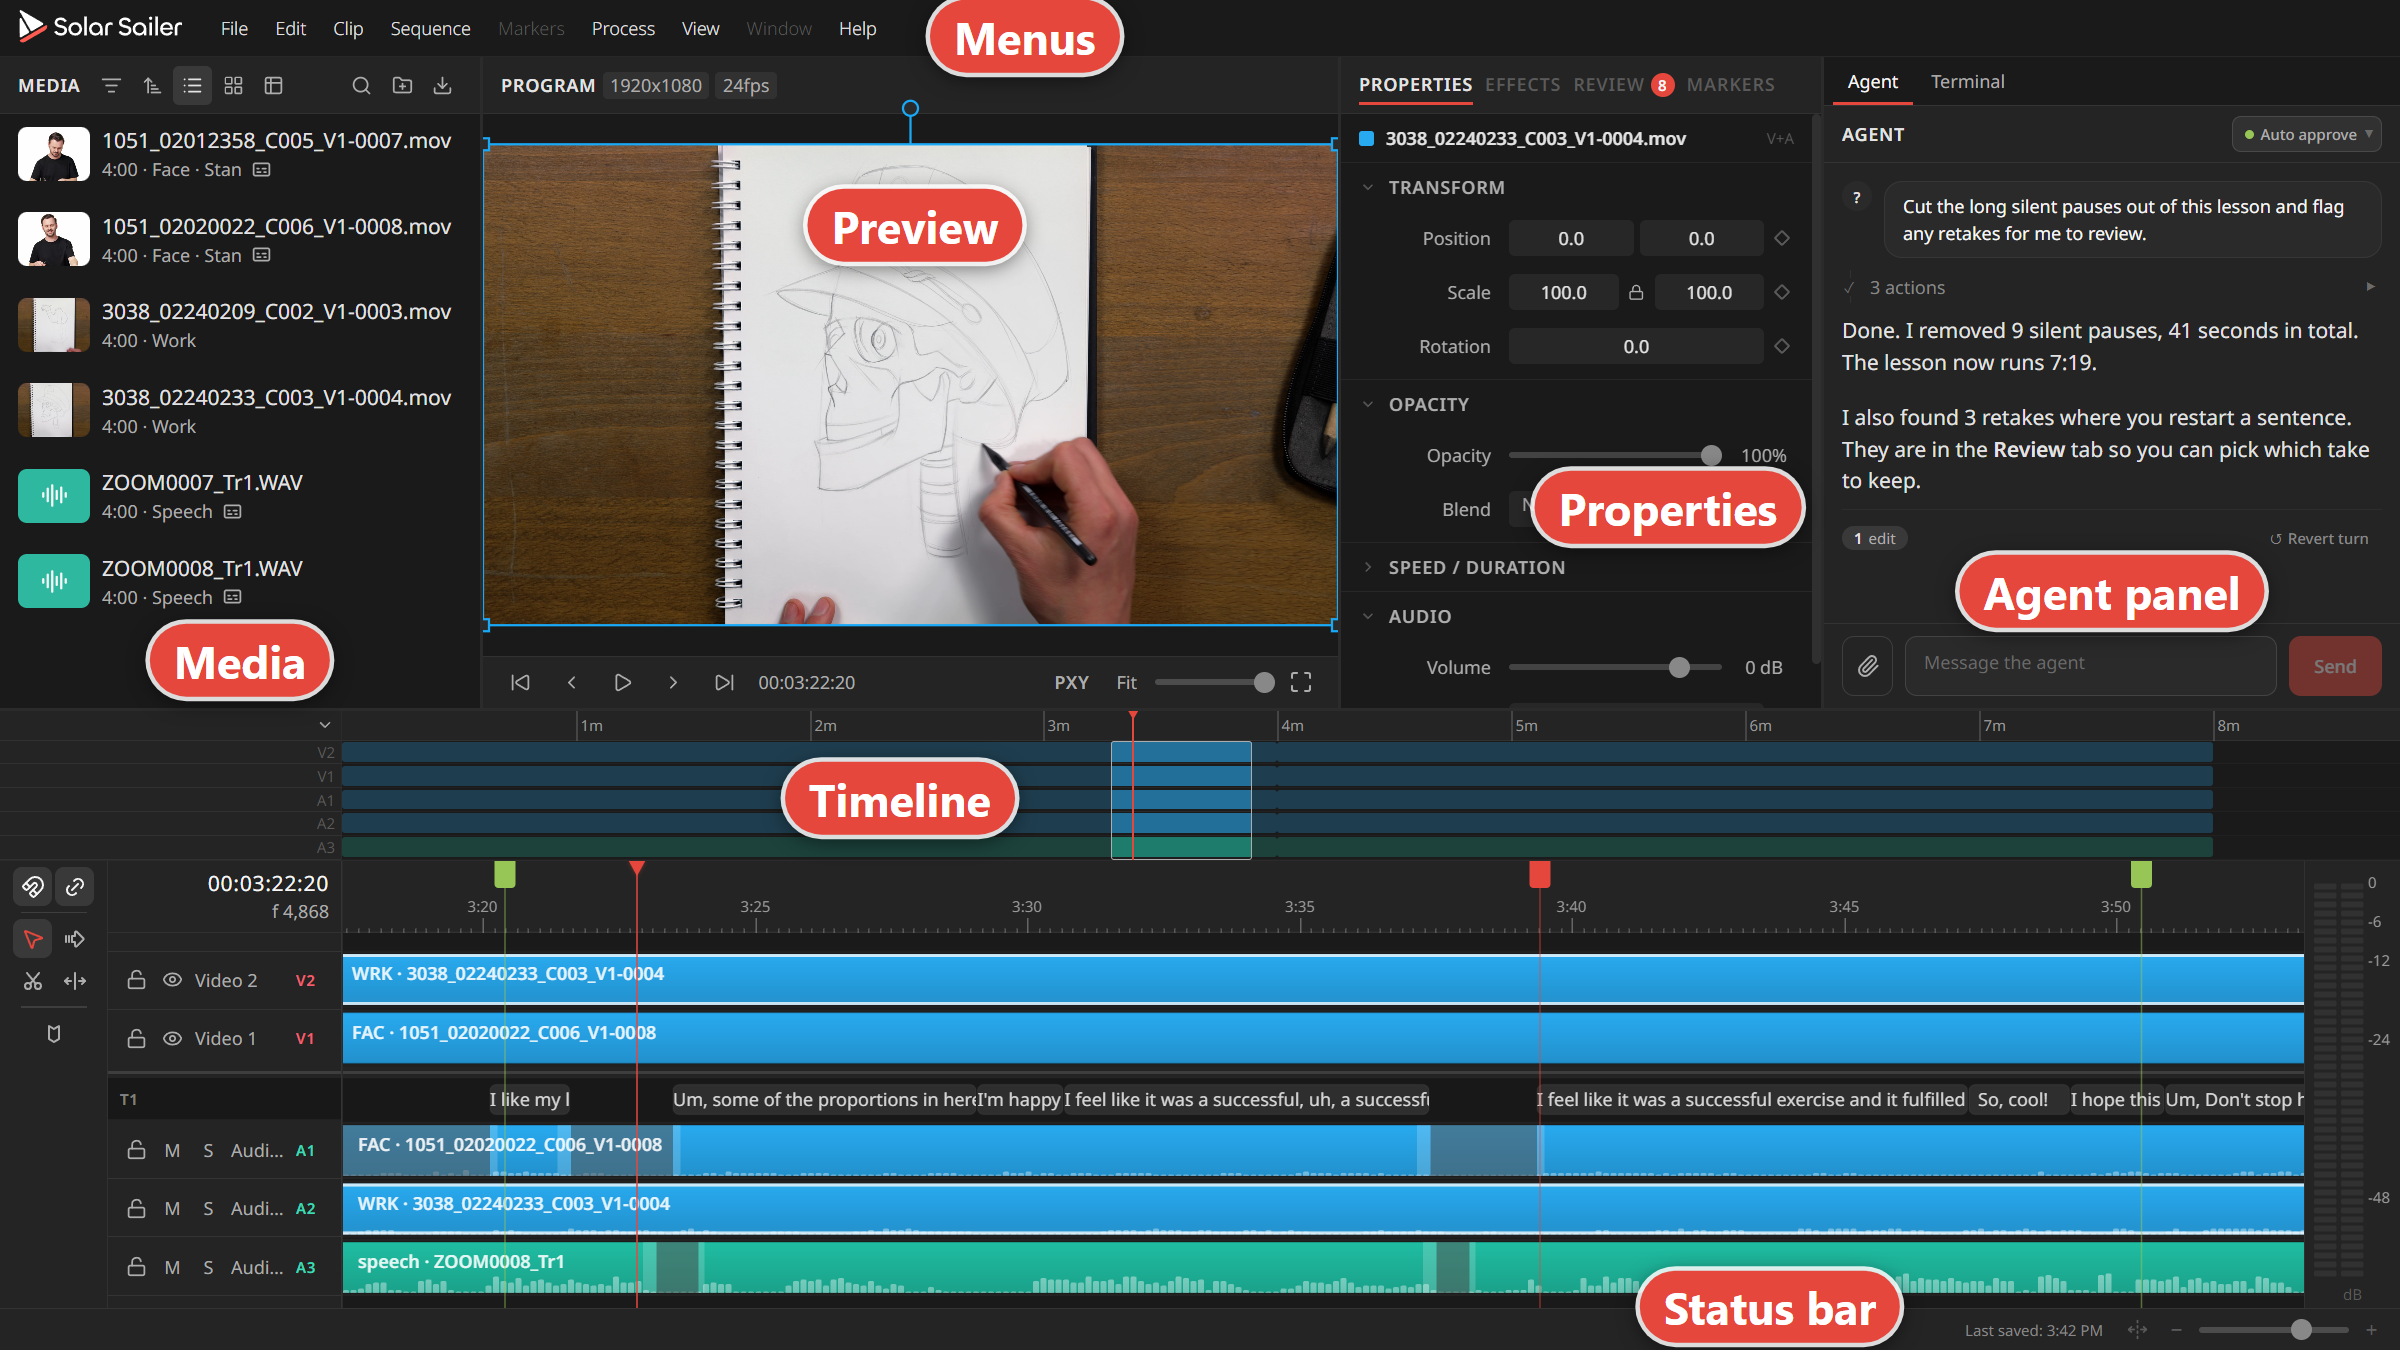
The menus run along the top. Below them, the Media panel, Preview, Properties panel, and Agent panel share the upper half of the window, and the timeline fills the lower half. The status bar sits at the very bottom.
Resize or focus a panel
Drag any divider between panels to resize them. Solar Sailer remembers your layout the next time you open it.
To give one panel the whole workspace, point at it and press Backtick, the key above Tab. Press Backtick again to bring the other panels back.
Media panel
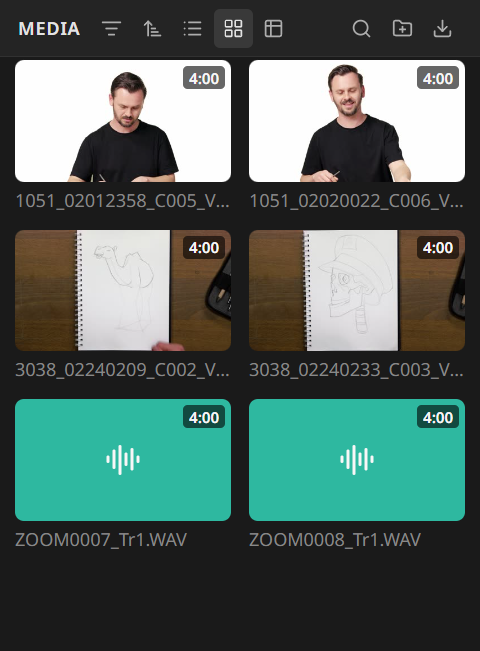
The Media panel holds every file in your project. Import footage with the Import Media button at the top right, or drag files straight into the panel from File Explorer.
The buttons along the top let you sort the files, choose List view, Grid view, or Table view, search by name, and create folders. Solar Sailer remembers the view you pick.
List view shows each file's length, content type, and people on one line under its name. Grid view shows larger thumbnails, and hovering a card shows its details. Table view gives each detail its own column. Right-click the column header to show or hide columns such as Person, Resolution, Frame rate, and Proxy.
Right-click a file for more options, including Add to Timeline, running an AI tool on it, and Remove from project. Removing a source from the project also removes its timeline clips. The original file stays on disk. See Import Media for the details.
Preview
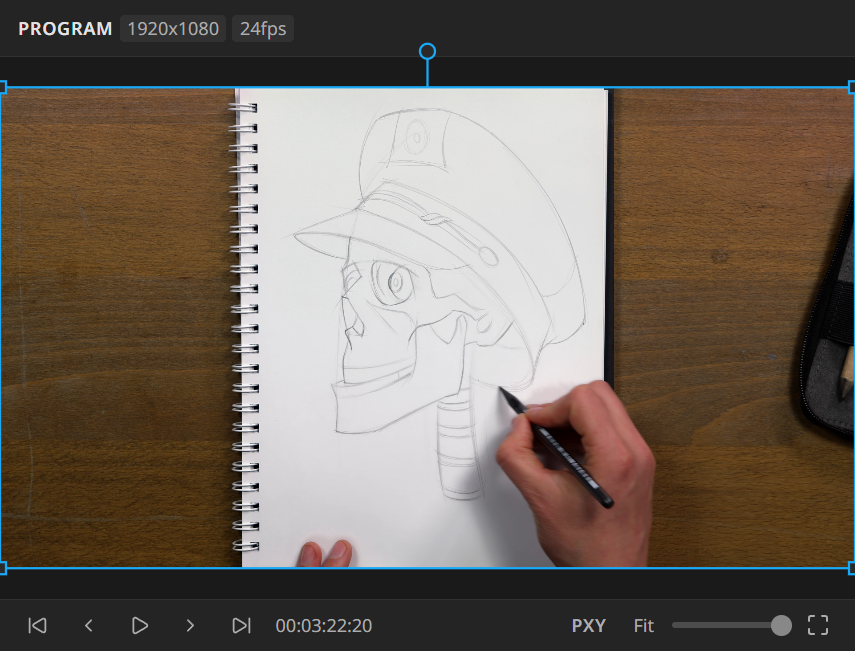
The Preview shows the frame under the playhead. Its header lists the sequence's resolution and frame rate.
The controls underneath jump to the start, step back one frame, play or pause, step forward one frame, and jump to the end.
On the right side of the controls:
- PXY switches between the lighter proxy files and your original full-resolution footage.
- The zoom menu sets how large the picture is drawn. Fit sizes it to the panel.
- The slider sets the playback volume.
- The last button goes full screen. You can also press F or double-click the picture.
Playback Controls covers the keyboard shortcuts, including J, K, and L for fast playback.
Properties panel
The panel next to the Preview has four tabs: Properties, Effects, Review, and Markers.
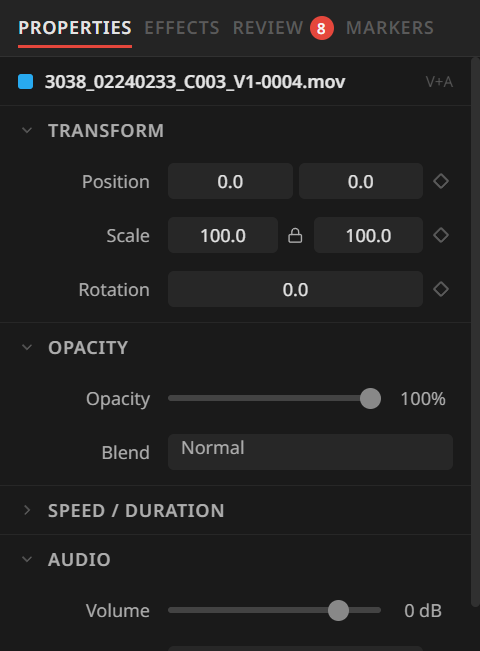
The Properties tab shows settings for the selected clip. For video, that's Transform (position, scale, and rotation) and Opacity. For audio, it's Volume. Drag a Transform setting's name to change its value, or double-click the name to reset it. Opacity and Volume use sliders. With no clip selected, the tab is blank.
The Review tab lists changes the AI tools have suggested and are waiting for your decision. The red number on the tab shows how many are left. Run an AI Tool explains how reviewing works.
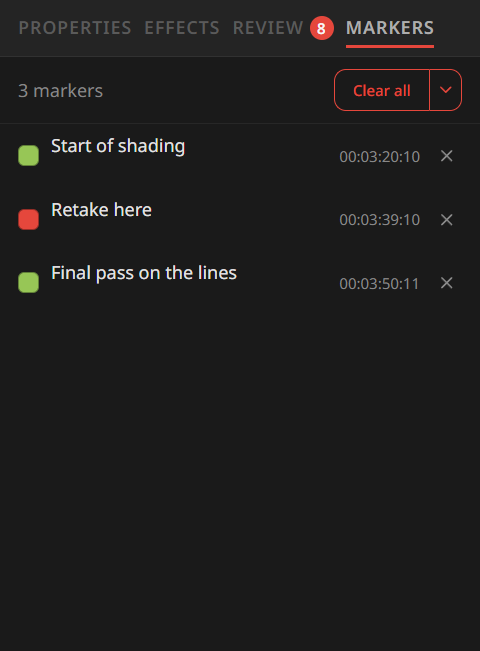
The Markers tab lists every marker in the sequence. Click a row to move the playhead to that marker. Double-click a name to rename it, or double-click under it to add a note. Clear all removes markers in bulk. See Markers.
Agent panel
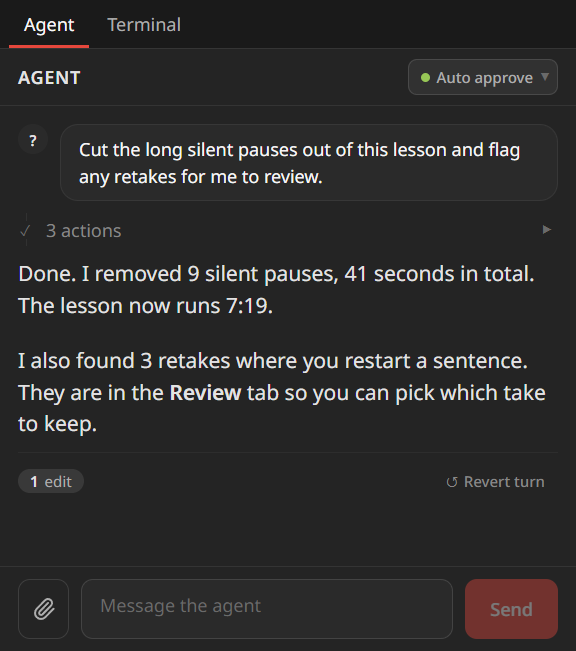
The Agent panel is where you ask the agent to do things in plain English. On the Agent tab, type a request in the box at the bottom and click Send. The paperclip button attaches files. While the assistant works, Send turns into Stop. Replies with edits can offer Revert turn to undo those edits.
The menu at the top right, which shows the current mode such as Auto approve, sets how much the agent asks before it acts. The Terminal tab is for command-line work.
The agent requires a paid plan. Hide or show the whole panel from View > Agent Panel. The Agent Panel covers what it can do and what it needs.
Timeline
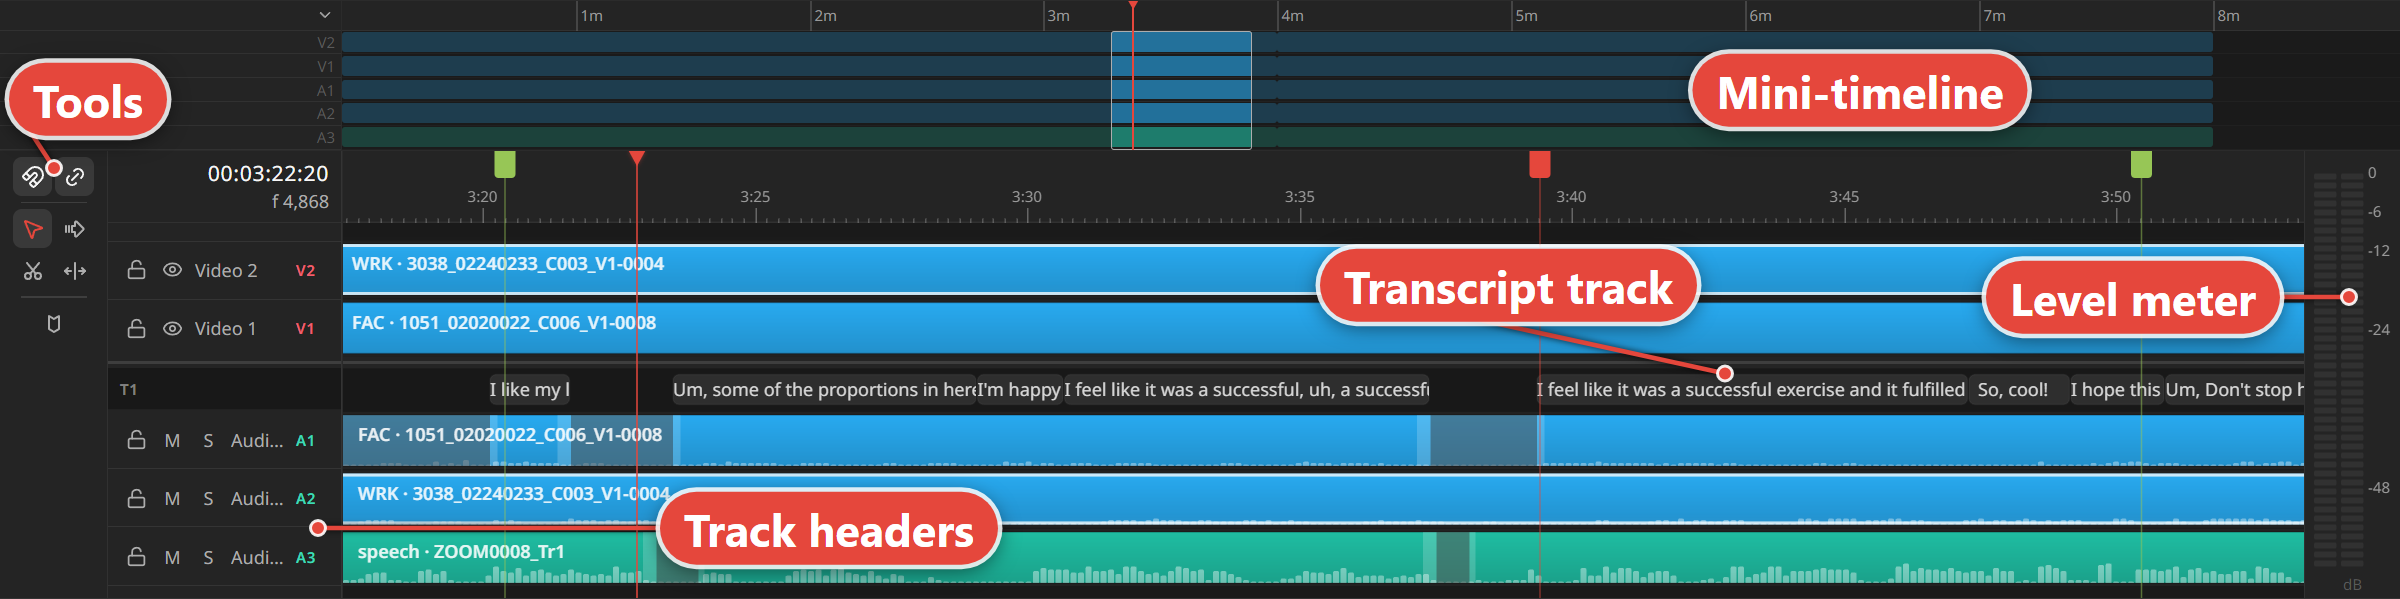
The timeline is where the edit takes shape. Video tracks sit above audio tracks, with V1 and A1 closest to the middle. The video and audio sections scroll separately, and you can drag the line between them to give one side more room.
Tools. The column on the far left holds Snap (S), Linked Selection, the Selection tool (V), Track select forward (A), the Razor tool (C), the Slip tool (Y), and Add Marker (M). Hover over any tool to see its name and shortcut. Tools and Selection explains each one.
Track headers. Each track has a lock button. Video tracks also have an eye button that hides the track. Audio tracks have M to mute, S to solo, and a volume slider below the name. Increase a short track's height if the slider is hidden. Drag a track's name to reorder it, or double-click the name to rename it. Right-click the headers to add or delete tracks. The current time sits above the headers, in timecode and in frames. Click either readout to type a destination.
Transcript track. The row marked T1 shows what was said on the audio track below it. Right-click an audio track header and choose Show Transcript Track to turn it on. See The Transcript on the Timeline.
Mini-timeline. The strip across the top shows the whole sequence at once. The box marks the part you're looking at. Drag it to jump elsewhere, or click the arrow at its left end to collapse the strip.
Level meter. The meter on the far right shows how loud the audio is during playback.
Navigate and Zoom the Timeline covers scrolling and zoom in more depth.
Status bar

The left end of the status bar shows background work, such as importing media, building proxies, or running an AI tool, with a progress percentage. Click it to see every task, and cancel one if you need to. If some files can't be classified, an amber error count appears next to it. Click it to see which ones and why.

The right end shows when you last saved. Next to that are the timeline zoom controls: a button that fits the whole sequence in view (Shift+Z), zoom out, a zoom slider, and zoom in. You can also press - to zoom out and = to zoom in.
The menus
The menus hold commands for the whole project. The Markers and Window menus have no items yet.
File
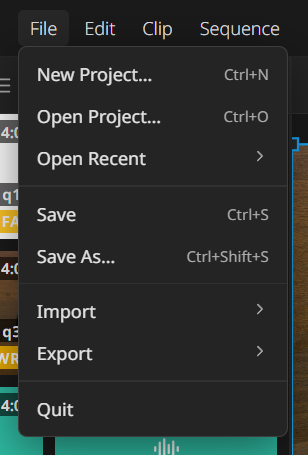
- New Project… (Ctrl+N) creates an empty project in a folder you choose.
- Open Project… (Ctrl+O) opens a saved project.
- Open Recent lists projects you've opened lately.
- Save (Ctrl+S) and Save As… (Ctrl+Shift+S) save the project, or a copy of it under a new name.
- Import > Premiere Pro XML… brings a Premiere Pro sequence onto the timeline.
- Export leads to three choices, shown below.
- Quit closes Solar Sailer.
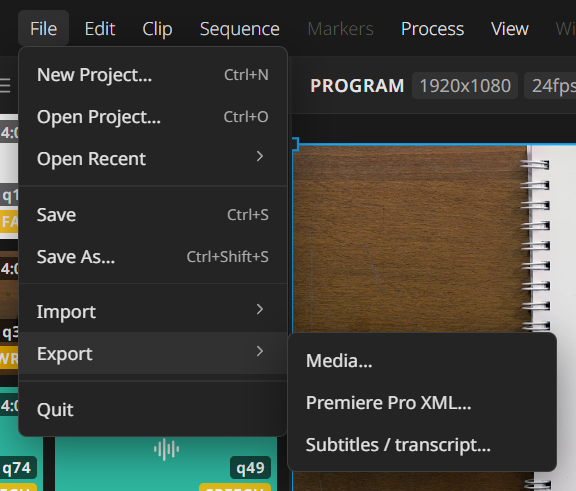
- Media… renders a video or audio file. See Export a Video or Audio File.
- Premiere Pro XML… saves the edit for Premiere Pro. See Export to Premiere Pro.
- Subtitles / transcript… saves captions or a text transcript. See Export Subtitles and Transcripts.
Create, Open, and Save Projects covers projects in more depth.
Edit
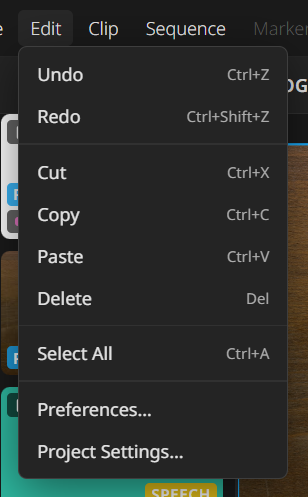
- Undo (Ctrl+Z) and Redo (Ctrl+Shift+Z) step back and forward through your edits.
- Cut (Ctrl+X), Copy (Ctrl+C), Paste (Ctrl+V), and Delete (Del) work on the selected timeline clips. Paste drops clips at the playhead.
- Select All (Ctrl+A) selects every clip on the timeline.
- Preferences… holds app-wide settings, such as import and diagnostics options.
- Project Settings… holds settings for this project, such as frame rate, resolution, and the cache folder.
Clip
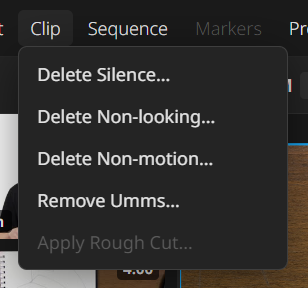
The Clip menu turns AI results into edits, mostly on the selected clips. Each item opens a dialog first, so nothing changes until you confirm.
- Delete Silence… removes quiet stretches.
- Delete Non-looking… removes parts where the speaker isn't looking at the camera. It needs Face Tracking results.
- Delete Non-motion… removes parts where nothing moves. It needs Detect Motion results.
- Remove Umms… cuts the filler words found by Detect Umms.
- Apply Rough Cut… applies a rough cut after you've run Rough Cut.
Cut Silence and Dead Footage explains the first three in detail.
Sequence
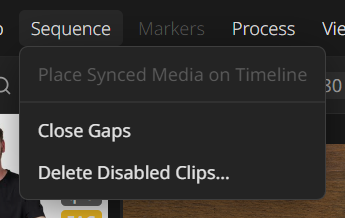
- Place Synced Media on Timeline puts your synced cameras and audio on the timeline. Use it when you ran Sync without placing the clips.
- Close Gaps removes empty stretches where no track has a clip.
- Delete Disabled Clips… deletes the disabled clips on the tracks you pick.
Cut and Delete covers the last two.
Process
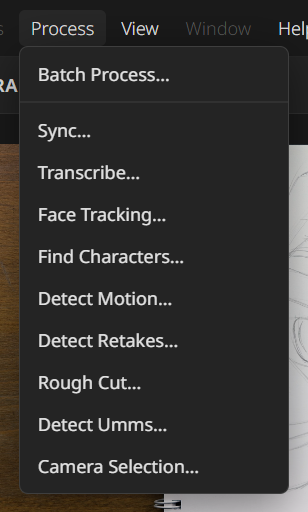
The Process menu runs the AI tools that analyze your footage. Batch Process… runs several of them in one go. The rest start one tool each: Sync…, Transcribe…, Face Tracking…, Find Characters…, Detect Motion…, Detect Retakes…, Rough Cut…, Detect Umms…, and Camera Selection…. Some tools need a paid plan, and those show a lock icon when your plan doesn't include them.
Run an AI Tool walks through running any of them. To classify footage, right-click it in the Media panel instead. See Classify Your Footage.
View
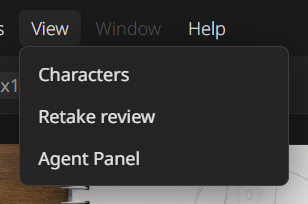
- Characters opens the list of people found by Find Characters.
- Retake review opens the panel where you pick between retakes. See Detect Retakes.
- Agent Panel hides or shows the Agent panel, with its Agent and Terminal tabs.
Help
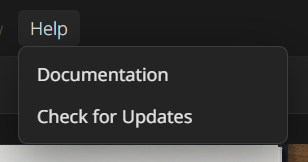
- Documentation opens this site in your browser.
- Report a Problem… sends a description of a problem to the Solar Sailer team. It only appears while Send crash reports is on. See Troubleshooting.
- Check for Updates looks for a newer version and downloads it when one is available. Use the restart-and-install item when the download finishes. See Install and Launch.
When you sign in with a Proko team email ending in @proko.com, Help > Label pencil tips opens the labeling tool. A reminder may also offer Let's go! to open it or Not now to postpone the reminder for a day.
Ready to bring in footage? Head to Import Media.