Interface Tour
Solar Sailer's main window keeps your footage, preview, clip controls, assistant, and timeline in one workspace. This map covers the few details that aren't obvious at first glance.
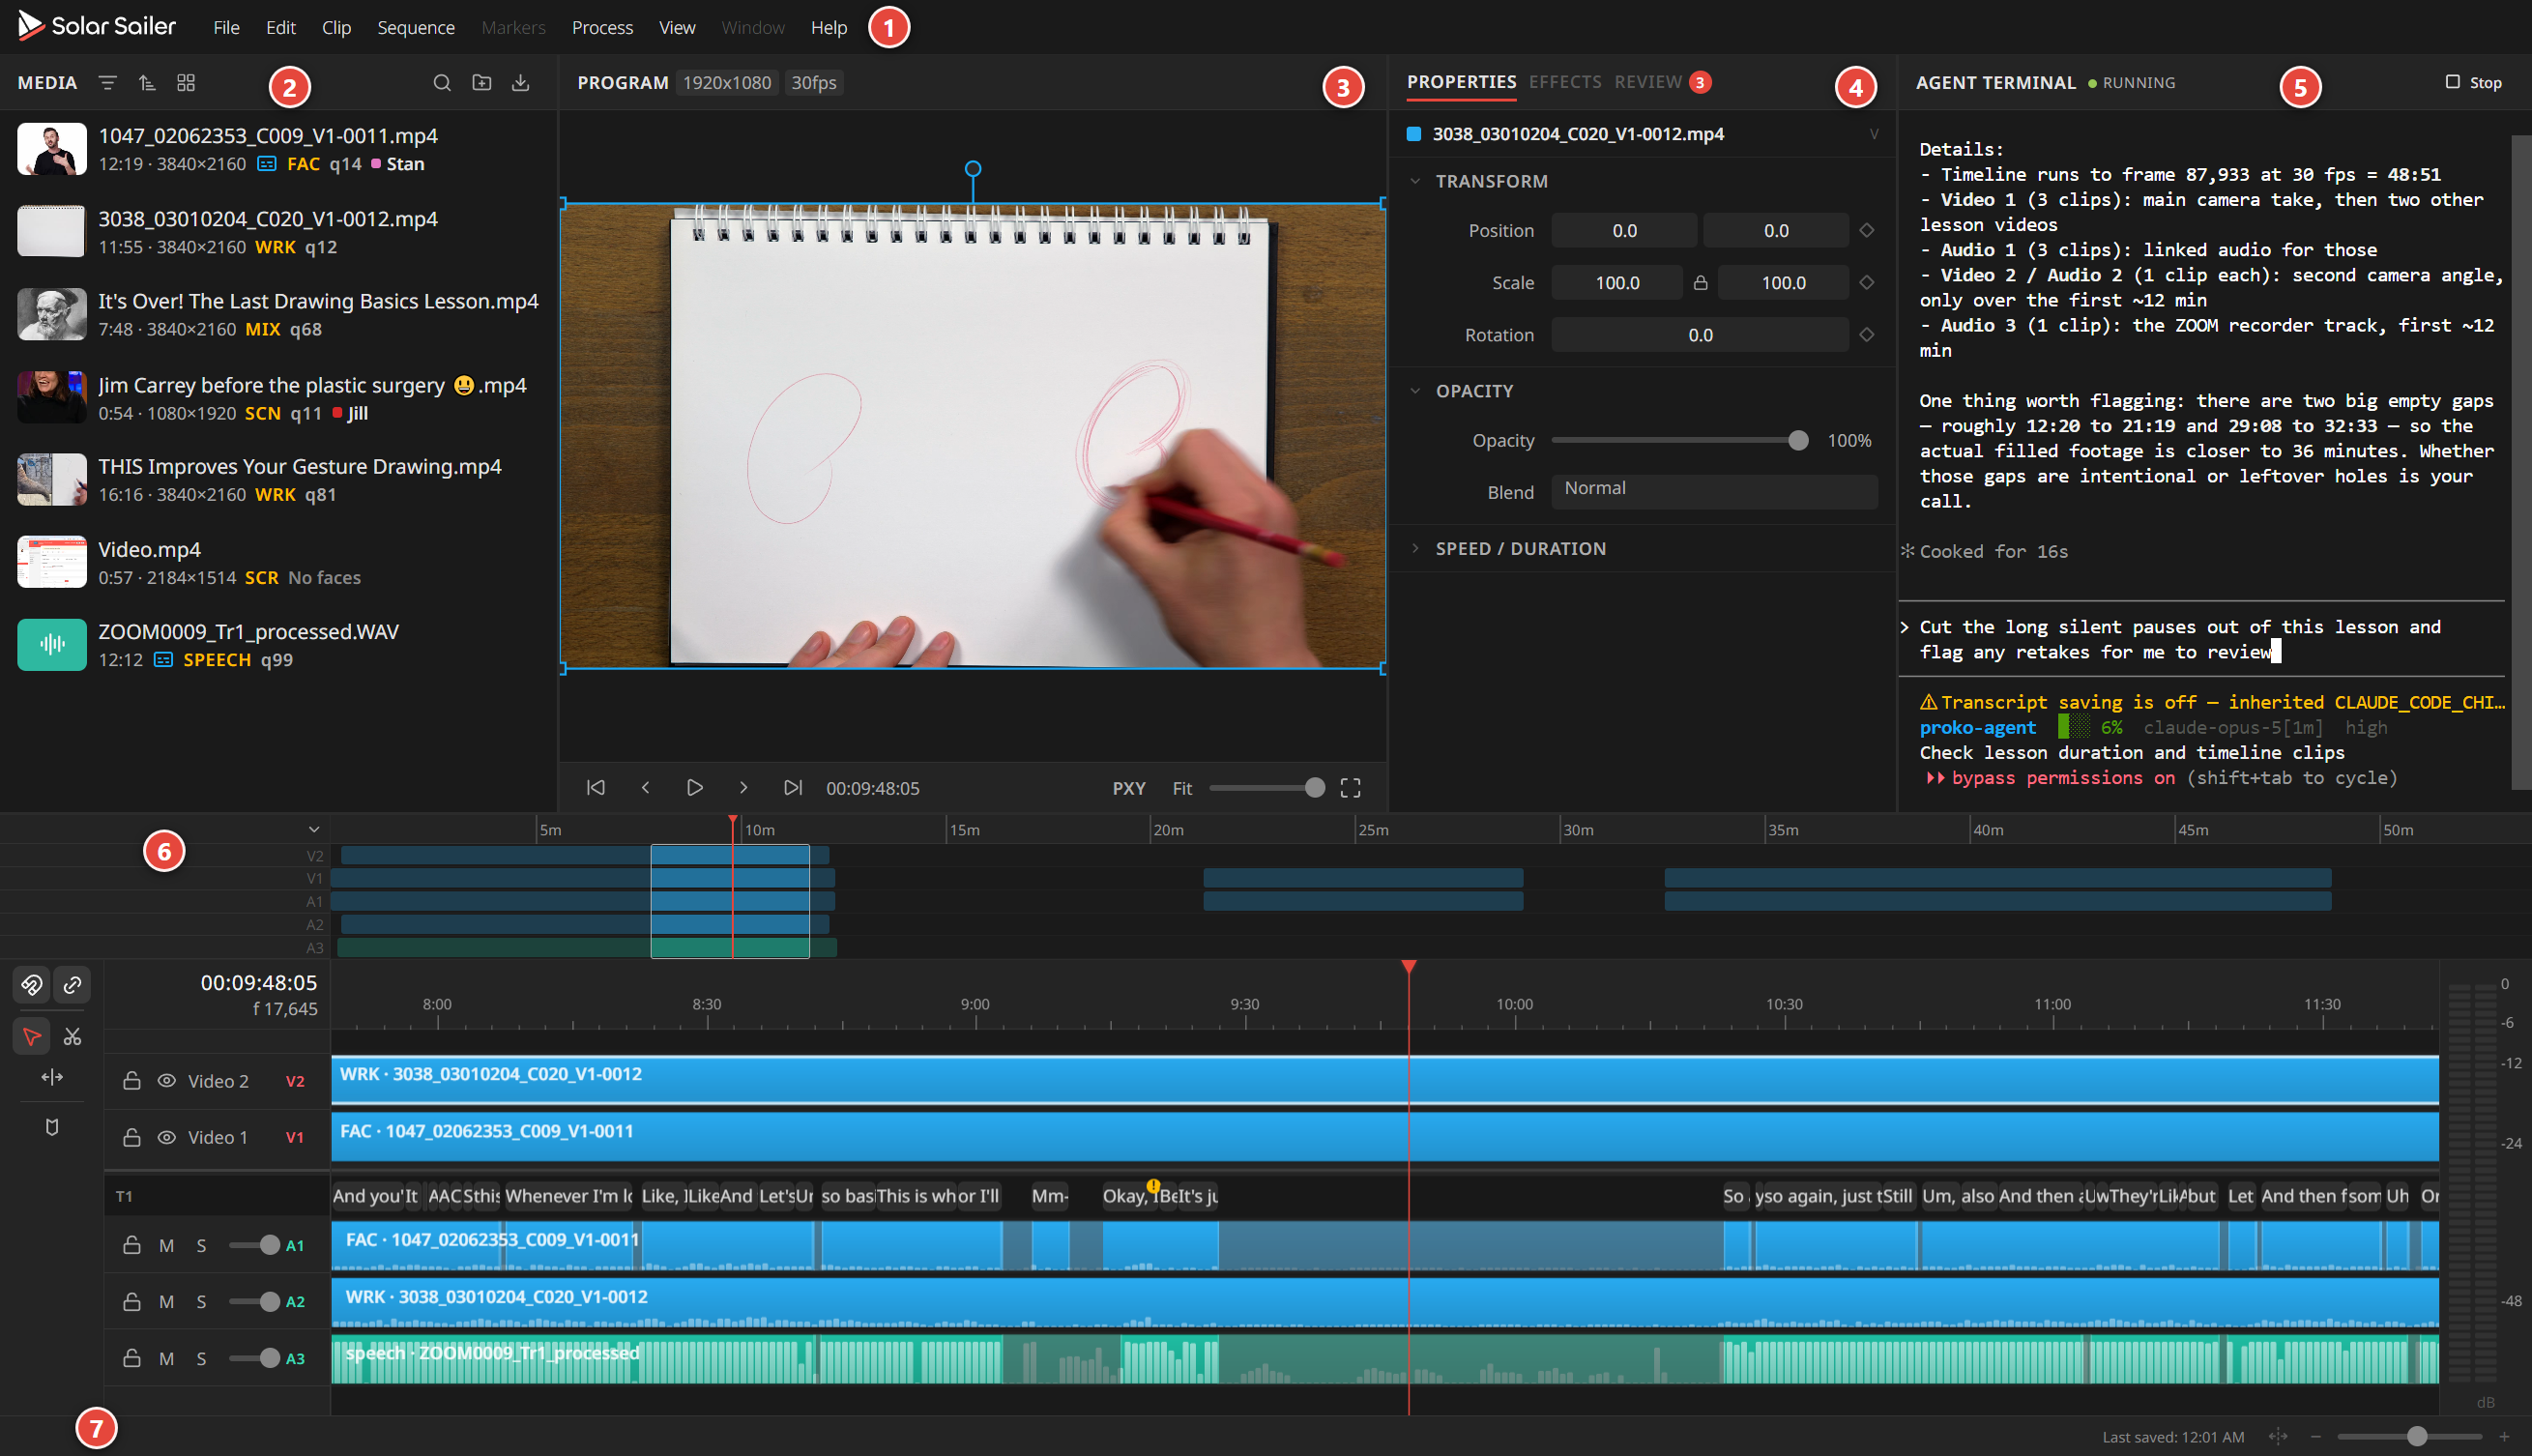
Find your way around
The upper part of the window holds the Media panel (2), Preview (3), clip controls (4), and AI panel (5). The timeline (6) runs across the lower part. Menus sit above the workspace (1), while saving and background work appear in the status bar at the bottom (7).
The Media panel is where you import and organize footage. The Preview shows the current frame and playback controls. The panel beside it has Properties, Effects, Review, and Markers tabs. Use these to adjust the selected clip, inspect suggested changes, or manage markers.
The AI panel has an Agent tab for working with the assistant in plain English and a Terminal tab for command-line work. You can hide or restore the whole panel from View > AI Assistant Panel. See The AI Assistant for the jobs it can handle.
Make room for the task at hand
Drag any divider to resize the panels. Solar Sailer remembers the layout when you reopen it.
To focus on one panel, point at it and press the backtick key (**). That panel fills the workspace between the menu strip and status bar. Press ** again to restore the layout.
Understand the timeline
The timeline is where the edit takes shape. Video tracks sit above audio tracks, with the tracks nearest the center labeled V1 and A1. The video and audio sections scroll separately, and you can drag the divider between them when one side needs more room.
Transcripts live on the timeline rather than in a separate transcript panel. Right-click an audio track header and choose Show Transcript Track to place its words above the audio.
Most editing commands are in the Edit, Clip, Sequence, and Process menus. The controls beside the timeline cover frequent hands-on work such as selecting, cutting, snapping, and adding markers. You don't need to learn every control before starting. Import a clip, place it on the timeline, and the rest of the workspace will make more sense in context.
Ready to bring in footage? Head to Import Media.